Jump-starting a battery is a method of starting a vehicle engine that has experienced battery failure by connecting said battery to another vehicle's battery that is still functioning.
This procedure requires high precision because errors in connecting the positive and negative poles can trigger damage to the electrical system or even cause an explosion in the battery unit.
This article will discuss the preparation of required equipment, safe cable connection steps, and preventive measures so that the jump-start process does not damage your car's electronic components.
Preparation Before Jump-Starting
The safety of the jump-start process depends heavily on the quality of the equipment and the environmental conditions around the stalled unit. Ensure you are in a flat area and away from flammable substances.
Mandatory Equipment:
- Jumper Cables: Use cables with a thick copper cross-section to conduct large currents stably.
- Donor Car: A vehicle with a healthy battery condition and equivalent voltage capacity to the stalled car.
- Gloves & Mask: As protection from potential sparks or acidic battery fumes.
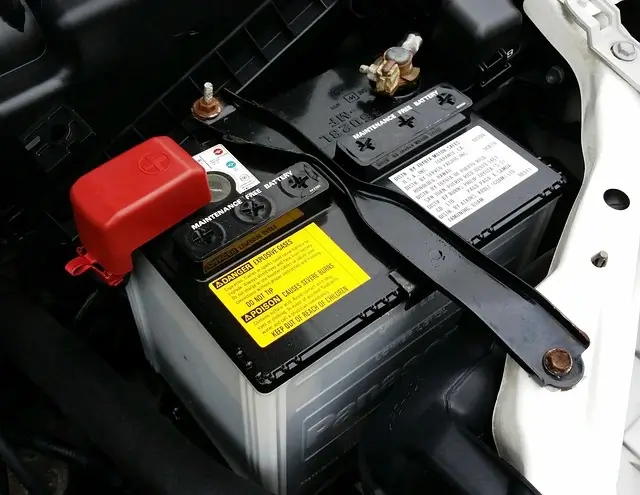
If the vehicle battery often experiences power failure even after being jump-started, this could be an indication that you need to replace car spare parts, especially in the battery or alternator section.
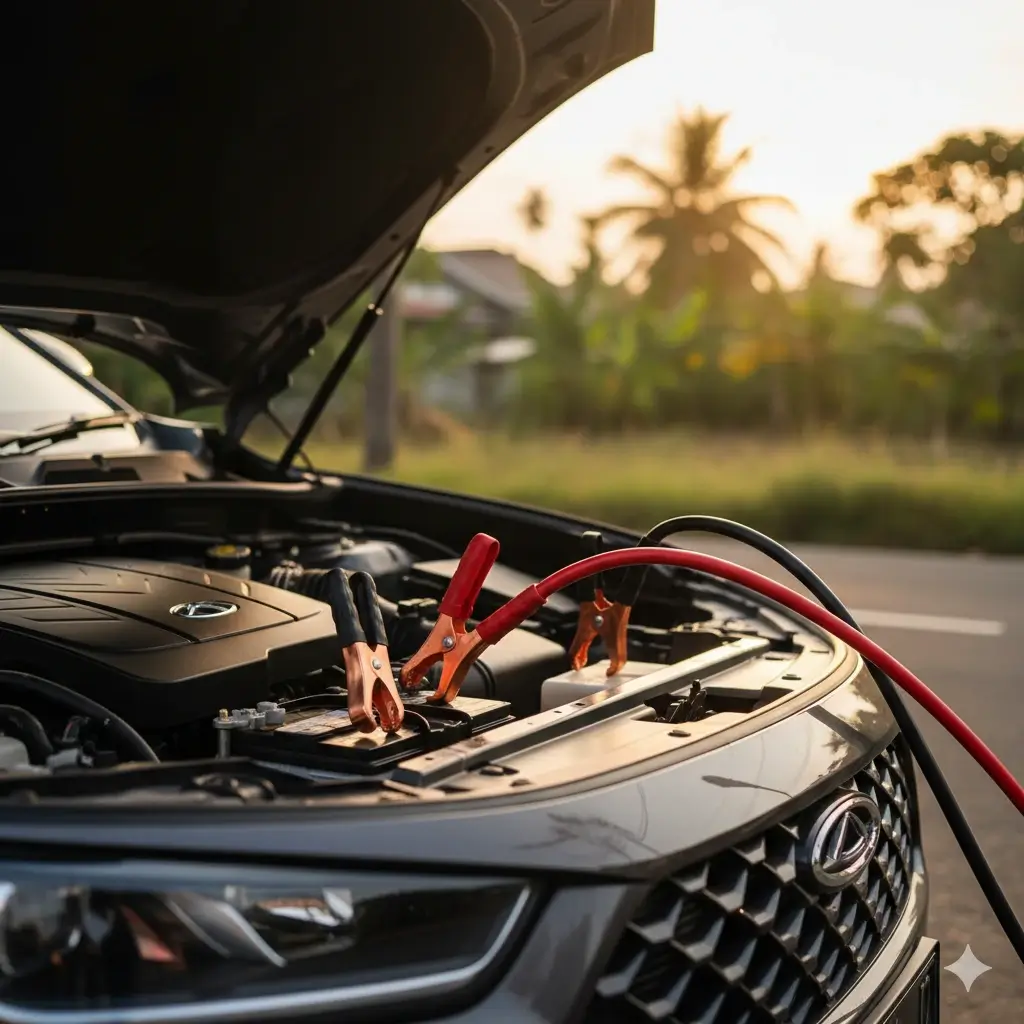
Correct Battery Jump-Start Steps
The cable connection sequence is the main key to avoiding short circuits during the power transfer process.
1. Position the Vehicles
Bring the two cars close enough so that the jumper cables can reach both batteries without being pulled tight. Ensure both engines are in the OFF position and the transmission is in Park (P) or Neutral (N).
2. Connect the Positive Cable (Red)
- Clamp one end of the red cable to the positive (+) pole of the stalled car's battery.
- Clamp the other end of the red cable to the positive (+) pole of the donor car's battery.
3. Connect the Negative Cable (Black)
- Clamp one end of the black cable to the negative (-) pole of the donor car's battery.
- Clamp the other end of the black cable to the chassis or metal ground part of the stalled car (do not connect directly to the negative pole of the dead battery to avoid direct sparks to hydrogen gas).
4. Charging Process
- Start the donor car's engine first and let it run for a few minutes.
- Try to start the stalled car's engine slowly.
- Let both engines remain running after successfully starting so that the alternator can charge the empty battery independently.
It should be noted that this jump-start procedure is specifically for Internal Combustion Engine (ICE) cars. For electrified vehicles, there are significant differences in power management between conventional batteries and electric car batteries and types used.
Prohibitions When Jump-Starting a Battery
Ignoring safety procedures can cause permanent damage to the Electronic Control Unit (ECU) of modern vehicles.
- Do not allow the two ends of the jumper cables (red and black) to touch when one end is already attached to the battery.
- Do not jump-start a battery that shows physical signs of cracking, leaking, or emitting a pungent odor (rotten eggs).
- Do not smoke near the battery due to the risk of explosive hydrogen gas.
Conclusion
The correct way to jump-start a car battery requires a systematic sequence: positive to positive, then negative to metal ground. By following safe procedures, you can overcome stalled engine issues without having to call a tow service immediately. However, if the engine still cannot start after the jump-start attempt, immediately contact a professional technician for further charging system checks.